
Tables in a text are a wonderful way to convey data that would be difficult to understand in a list or paragraph style.
However, it’s usual to underestimate the number of rows or columns you’ll need in your table, which means you’ll need to know how to add a row to a table in Google Docs.
Fortunately, Google Docs includes a number of table editing tools, one of which allows you to perform this activity.
The steps in this guide will show you how to insert a new row into an existing table in Google Docs.
- You have the ability to add a row either above or below where your cursor is currently located in the table.
- The same method that you use to add a row in Google Docs can also be used to remove a row from a table.
- At the bottom of the menu, when you right-click on the table is an option called “Table properties.” If you open that menu, you will have access to additional settings for the table.
How to Insert Another Table Row in Google Docs
- Open your document.
- Click inside the row above where you want the new row.
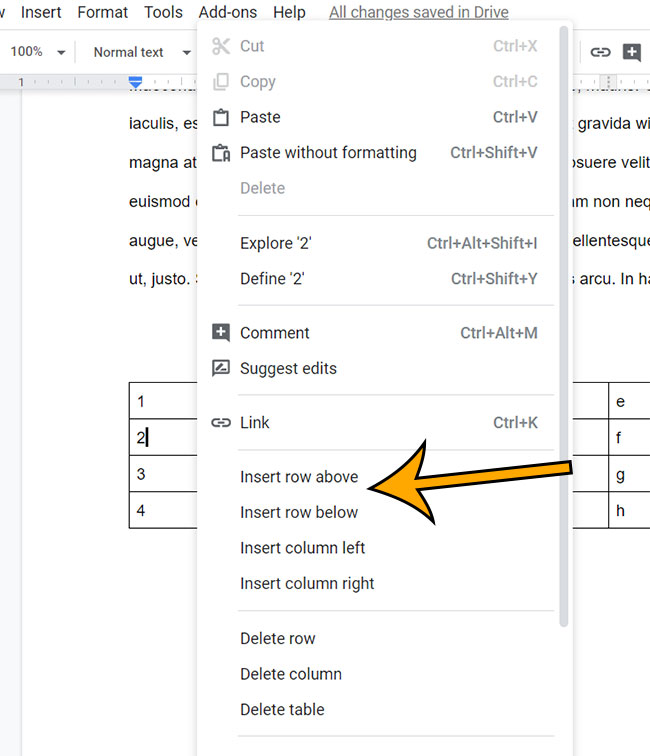
- Right-click on the selected row and choose Insert row below.
You could also click in the row below where you want the new row, then select the Insert row above option.
Adding a table to a document in Google Docs provides you with a structured way to display data that is relevant to your document.
When you first create the table you are able to specify the number of rows and columns in the table. However, you are limited in the amount of rows that this table can include.
But after the table is created, there is a way to add rows to the Google Docs table, and you can even choose where those rows are added.
Our tutorial below will show you how to add a row to a table in Google Docs.
How to Add a Table Row in a Google Document
The steps in this article were performed in the desktop version of the Google Chrome Web browser, but will also work in other desktop browsers like Firefox or Edge.
Step 1: Sign into your Google Drive and open the document containing the table.
Step 2: Click inside a cell in the row either above or below where you wish to add the new row.
Step 3: Right-click on the cell, then choose the Insert row below or Insert row above option.
As mentioned earlier, there is a Table properties option on the menu that appears when you right click. The Table properties menu is shown below.
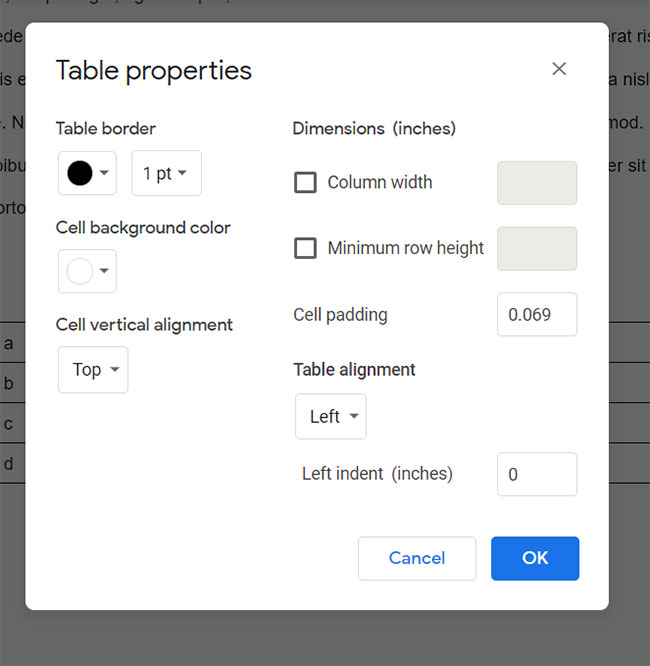
On this menu you can adjust properties for your table, including the alignment, dimensions, border, and more.
Find out how to remove a hyperlink in Google Docs if you have an unwanted link in your document.
Frequently Asked Questions About Adding Table Rows in Google Docs
In Google Docs, how do I insert a table?
Choose where you want the table to go, then click the Insert tab at the top of the window, select the Table option, and then specify the number of rows and columns.
In Google Docs, how can I add columns to a table?
Click inside a cell near where you want to add rows, then right-click on the cell and pick Insert column left or Insert column right.
In Google Docs, how can I delete rows or columns?
Right-click inside a cell in the row or column you want to delete, then select the Delete row or Delete column option.
When you select Delete row or Delete column, it will delete the range in which your mouse cursor is presently located.
How can I modify the width or height of a column or row in Google Docs?
Right-click the table and select Table properties; then, as appropriate, adjust the Column width and Minimum row height settings.
How can I remove an entire table from a Google Doc?
If you want to delete an entire table from your document, right-click on one of the table’s cells and select the Delete table option.
For additional details, see our article on how to delete a table in Google Docs.
Our article continues below with more information on how to add a row in Google Docs.
More Information About Google Docs Tables
While the methods in this guide have primarily focused on how to include a table row in an existing table, you may also require knowledge of how to add a complete table.
You may do this by clicking the Insert tab at the top of the window, then select the Table option from the dropdown menu, and then specifying the number of rows and columns in the table.
When you right-click on your table, you’ll find a Table properties option as well. When you select Table properties, you will be given extra editing options for your table, including:
Cell vertical alignment can be found on the Alignment tab.
Cell background color – located on the Color tab.
Column width – found on the Column tab Minimum row height – found on the Row tab.
On this menu, you may also find a few other choices for editing tables by expanding the sections in the Table properties column.
Matthew Burleigh has been writing tech content online for more than ten years. He enjoys writing about Google Docs in addition to many other applications and devices and has cumulatively covered Google’s word-processing application in hundreds of different articles.
He has been published on dozens of popular websites, and his works have accumulated millions of pageviews.
While focused primarily on tutorials and guides for popular electronics like the iPhone and iPad, as well as common applications like Microsoft Word, Powerpoint, and Excel, he covers topics across the entire technology spectrum.
You can read his bio here.