
When you are dealing with documents, one thing that can be done to save you a significant amount of time is to update your default settings.
If you consistently make identical modifications to new documents, then using those instead of creating new ones merely makes more sense.
This is one of the reasons why you might be curious about how to modify the font that is selected by default in Google Docs.
Our tutorial continues below with more information about how to change the Google Docs default font.
How to Switch the Default Font in Google Docs
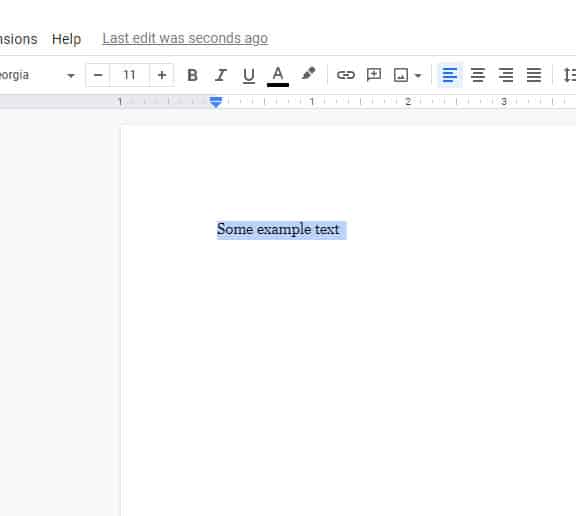
- Open your document.
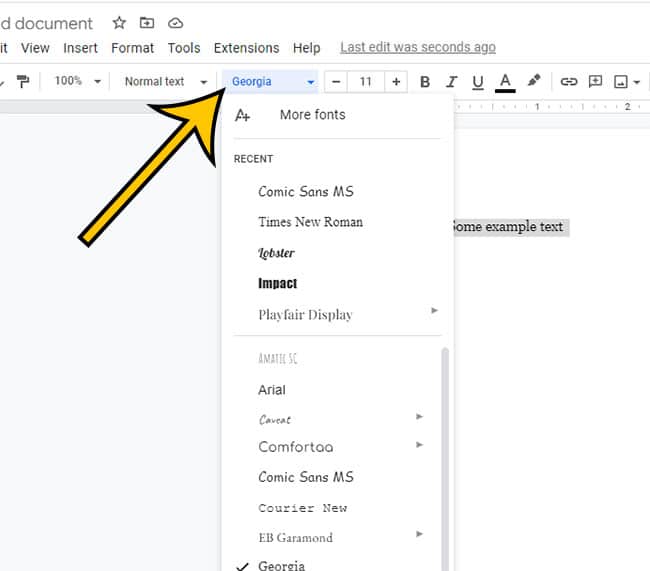
- Choose some normal text.
- Select the Font button and choose your default.
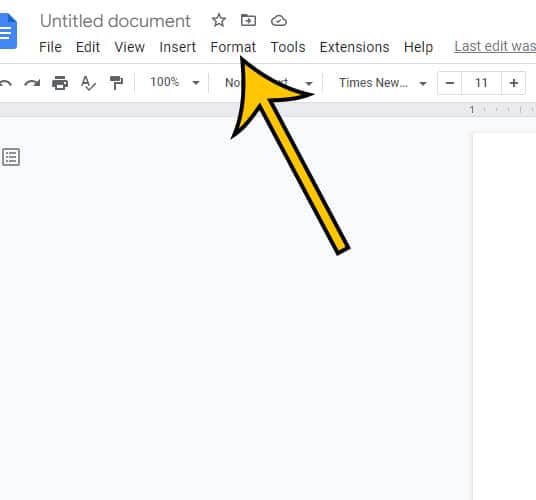
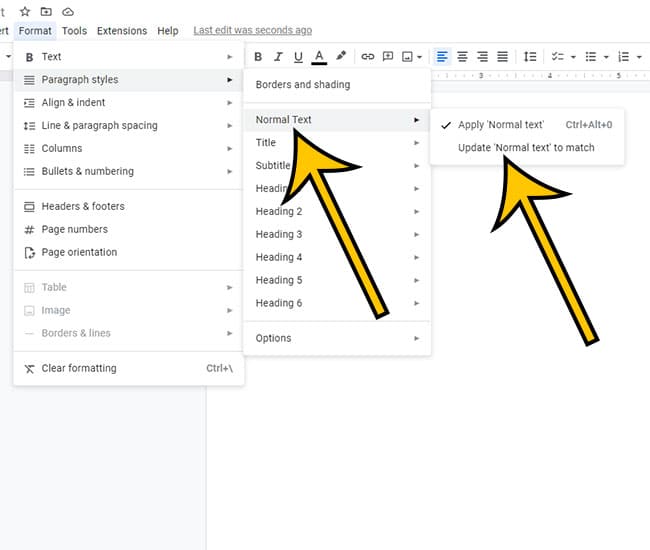
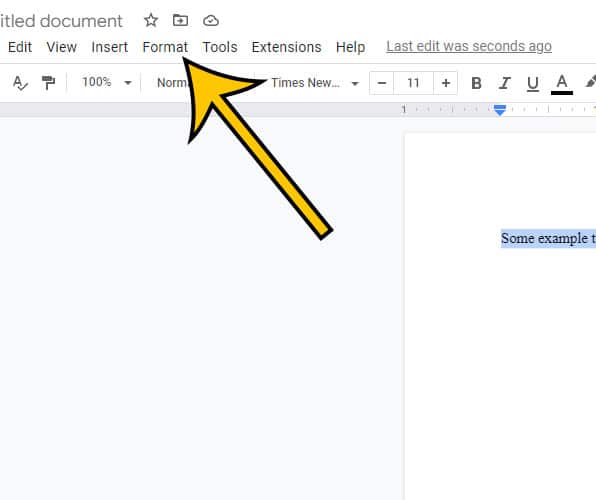
- Click Format.
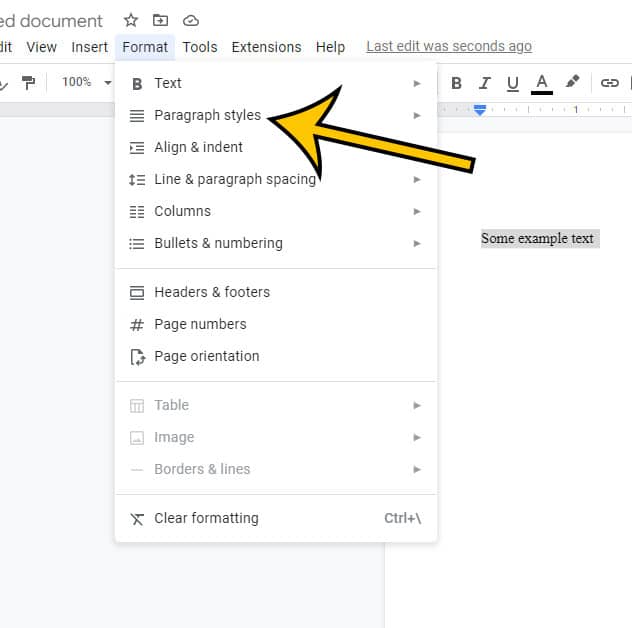
- Choose Paragraph styles.
- Select Normal text, then click Update normal text to match.
- Choose Format once again.
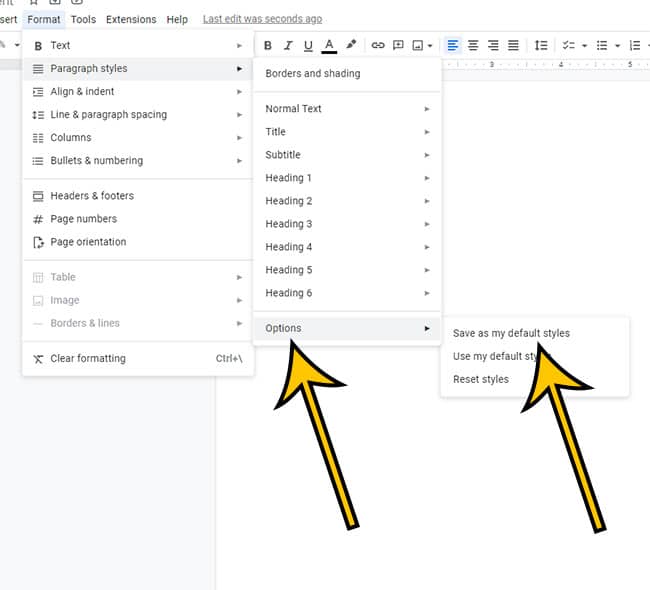
- Select Paragraph styles.
- Click Options, then click Save as my default styles.
Our guide continues below with additional information on changing this document setting, including pictures of these steps.
You have access to a wide variety of settings and formatting options within Google Docs, all of which can be used to modify the way that your text appears.
With just a few clicks, you’ll find a large selection of fonts and colors, the ability to add subscript and superscript text, and the capability to change the spacing and margins of your document.
When you begin typing text into a Google Docs document, it will utilize the font that you have set as the default font for that document. If you’ve never modified this setting previously, then the default font is most likely Arial.
However, if you find yourself altering the font each time you make a new document, you might find it more convenient to switch to a different option.
The formatting of the text that you contribute to your document in Google Docs is handled via a mechanism known as “styles.”
There is a selection of formatting options available for things like titles, headings, and regular text.
Text in documents is almost always formatted using the normal text style, which is also the format that you most likely make the greatest use of yourself.
Any normal text that you put into a Google Doc may, thankfully, have its default font style altered so that it more closely matches your own preference.
Related: You can read our guide on changing font colors in Google Docs for more information.
How to Apply a Different Default Google Docs Font
Step 1: Go to Google Docs and open a document.
Step 2: Highlight some normal body text.
Step 3: Choose the Font dropdown menu, then click the font to set it as the default.
Step 4: Select the Format tab at the top of the window.
Step 5: Choose the Paragraph styles menu option.
Step 6: Click Normal text, then the Update normal text to match item.
Step 7: Choose the Format tab a second time.
Step 8: Click the Paragraph styles option one more time.

Step 9: Select Options, then the Save as my default styles option.
Now that you know how to change the Google Docs default font, future documents that you create will use whichever option you chose in the steps above.
More Information About Using Styles in a Google Document
You may create and edit documents, spreadsheets, and presentations using Google Docs, a word processing program that is hosted on the cloud.
The use of styles to format your document is one of Google Docs’ core capabilities. Using styles is an easy way to format text, headings, and other parts of your page consistently. We’ll look at the styles offered by Google Docs in this post and how to utilize them to format your work.
Text styles – You can format the text in your document in Google Docs by using styles. Included among the standard text styles are Normal, Heading 1, Heading 2, Heading 3, and others. Simply choose the text you want to format, and then click the selected style from the Styles menu to apply the style. You may, for instance, use the Heading 1 style for your document’s primary headers and the Heading 2 style for its subheadings.
Paragraph styles – Google Docs also has paragraph styles in addition to text styles. You can structure full paragraphs using these styles, including the text, margins, and line spacing. Select the paragraph you want to format, then click the selected style in the Styles menu to apply the style.
Custom Styles – You have the option to design your own unique styles in addition to the standard ones. The text you want to use as a sample for the new style should be selected before choosing “Save as a new style” from the Styles menu. Once a custom style has been saved, it will be accessible from the Styles menu and can be used on other text in your document.
Theme Styles – You can format your document using theme styles, which are collections of pre-designed styles available in Google Docs. Simply choose the desired theme from the Styles menu to apply a theme style. Theme styles are a collection of text styles, paragraph styles, and other formatting options that all work together to give your page a unified appearance.
Keyboard Shortcuts – You can use keyboard shortcuts to make applying styles in Google Docs simpler. For instance, you can apply the Heading 1 style using the shortcut Ctrl + Alt + 1, and the Heading 2 style with Ctrl + Alt + 2. Simply pick Keyboard Shortcuts from the Help menu to obtain a list of all the keyboard shortcuts offered by Google Docs.
In conclusion, Google Docs’ robust styles function makes it simple to format your work. With the help of styles, you can easily give your document a unified appearance, whether you want to format text, paragraphs, or entire sections. You may format your document fast and effectively by using keyboard shortcuts, applying theme styles, and creating custom styles.
More On Google Docs Text Formatting
Text formatting in Google Docs is essential for producing documents that seem professional. Google Docs gives you a variety of options for font size, color, and style, as well as the ability to add bold, italics, and underlines to your text. We’ll look at the many text formatting options available in Google Docs in this tutorial.
- Typefaces: To format your text in Google Docs, you can select from a variety of fonts. Your text can also be bolded, italicized, and underlined in addition to having the font size and color changed. To change the font, first choose the text you want to format, and then from the toolbar’s font drop-down option, choose the new font. Select the text you wish to format, and then from the font size drop-down option, choose the required font size. Choose the text you wish to format, and then choose the desired color from the drop-down selection for the font color.
- Bold, Italic, and Underline: To format your text with bold, italic, or underlining, just choose the text you wish to change and click the toolbar icon for bold, italic, or underlining. The keyboard shortcuts Ctrl + B, Ctrl + I, and Ctrl + U can also be used to make text bold, italicized, or underlined.
- In Google Docs, you may utilize highlighting to call attention to particular passages of text. Simply choose the text you wish to highlight, and then from the toolbar’s highlighting drop-down menu, choose the desired color. To distinguish distinct forms of information in your document, you can highlight text using various colors.
- Lists: Task lists, numbered and bulleted lists, and other list styles are all available in Google Docs. Simply type your list items, check them off as you go, and then click the toolbar button for the appropriate list format to build a list. For a numbered list, bulleted list, or task list, you can alternatively use the keyboard shortcuts Ctrl + Shift + 7, Ctrl + Shift + 8, and Ctrl + Shift + 9.
- You can align your text in Google Docs to the left, center, right, or justified. Select the text you want to format, then click the toolbar button for the desired alignment to adjust the text’s alignment. The keyboard keys Ctrl + Shift + L, Ctrl + Shift + E, Ctrl + Shift + R, and Ctrl + Shift + J can also be used to align text to the left, right, center, or justified.
- To create a well-structured and organized document, you can change the indentation of your text in Google Docs. To indent text, all you need to do is pick the text you wish to format, then click the toolbar’s appropriate indent button. The keyboard keys Ctrl +] and Ctrl + [may also be used to change the indentation of text.
- You can adjust the line and paragraph spacing in Google Docs to produce a document that is well-organized. To change the line and paragraph spacing, first pick the text you wish to format, then from the line spacing drop-down option in the toolbar, choose the preferred line and paragraph spacing.
In conclusion, formatting text in Google Docs is essential for producing documents that look professional. It is possible to add bold, italic, and underline, as well as a variety of font sizes, colors, and style options.
Matthew Burleigh has been writing tech content online for more than ten years. He enjoys writing about Google Docs in addition to many other applications and devices and has cumulatively covered Google’s word-processing application in hundreds of different articles.
He has been published on dozens of popular websites, and his works have accumulated millions of pageviews.
While focused primarily on tutorials and guides for popular electronics like the iPhone and iPad, as well as common applications like Microsoft Word, Powerpoint, and Excel, he covers topics across the entire technology spectrum.
You can read his bio here.